How to Create, Track, and Procure Kits in Dots
This article walks you through how to create a new kit template, define asset specs, view availability, and purchase kits.
TL;DR: Kits bundle assets together for faster tracking and purchasing. You can watch a quick video right here.
At Dots, we save IT teams time and money. This is the reason behind our Kits feature: it’s another step towards complete IT asset management and IT procurement automation. Kits let you define the exact hardware specs required for a particular team and then track availability across Dots warehouses or procure them with just a few clicks.
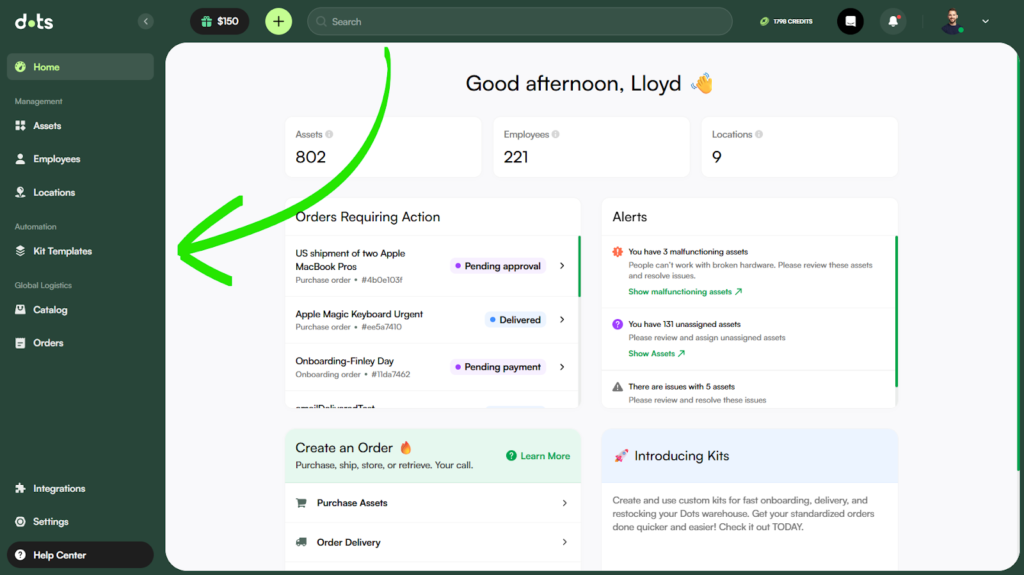
Step 1: Go to Kit Templates
From your Dots dashboard, click on Kit Templates on the left-hand menu
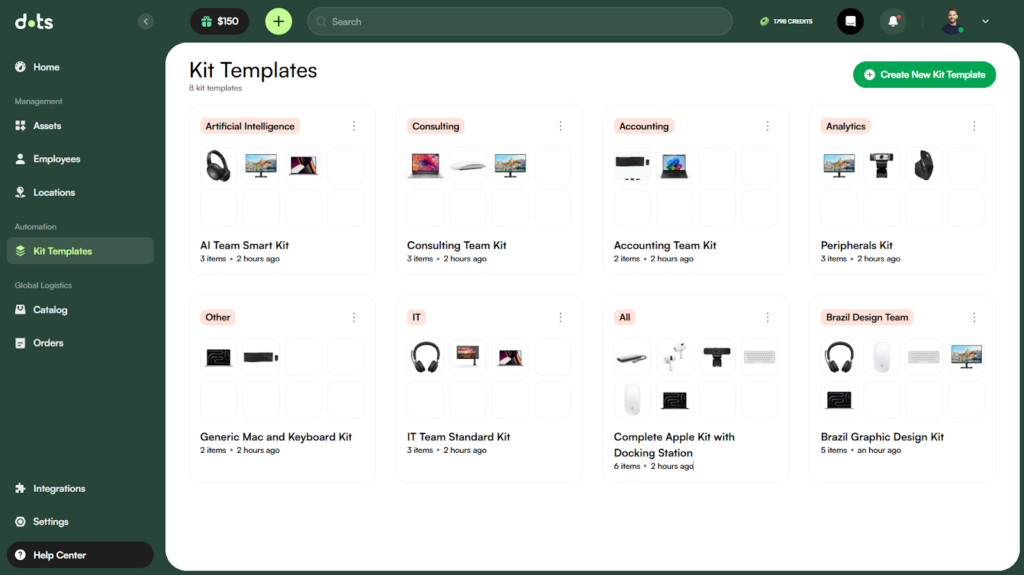
You’ll see any kit templates your team has already created.
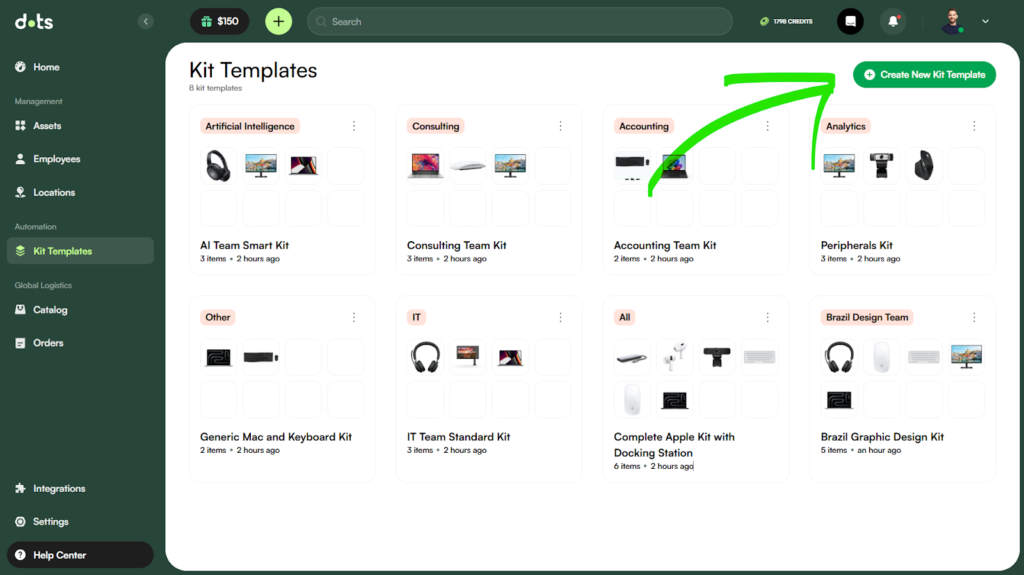
Step 2: Create a New Kit Template
Click Create New Kit Template in the top-right corner.
Give your kit a name, such as Graphic Design Kit.
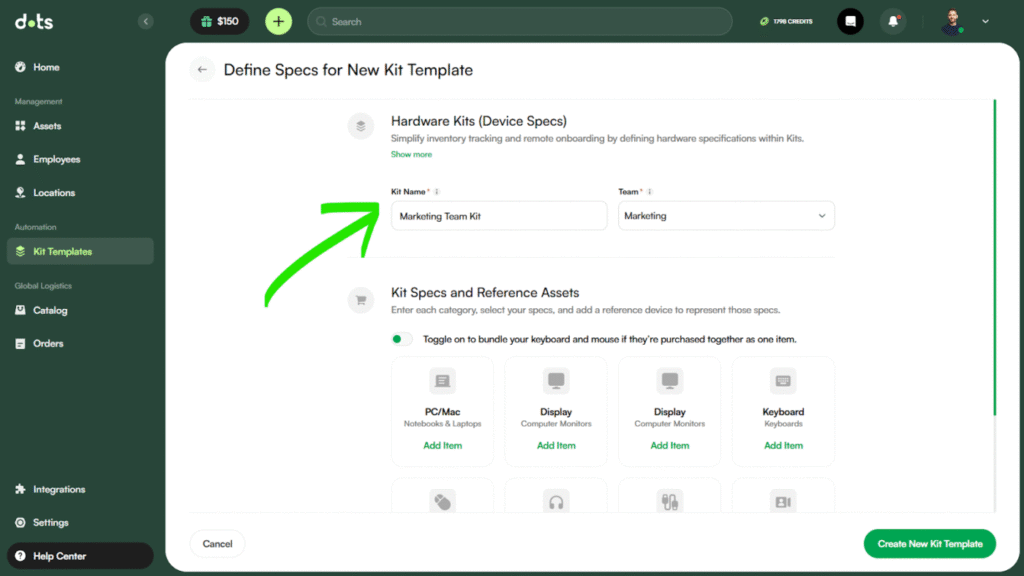
You can then assign it to a team. You can either choose from the dropdown or type a new team name into the field. For example, you can enter “Brazil Design Team” and create it on the spot.
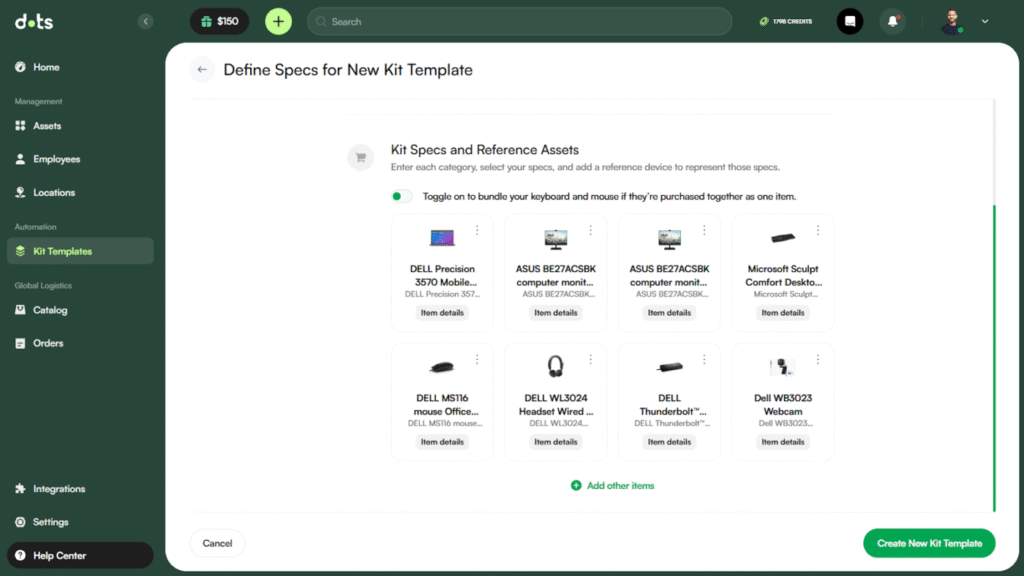
Each kit is made up of a series of items (like a laptop, screen, mouse, headset, etc.). You’ll see placeholders for a PC/Mac, two displays, and multiple peripherals. By clicking on the toggle you can bundle the keyboard and mouse into a combo option instead of a single asset. You can also add other assets, such as swag.
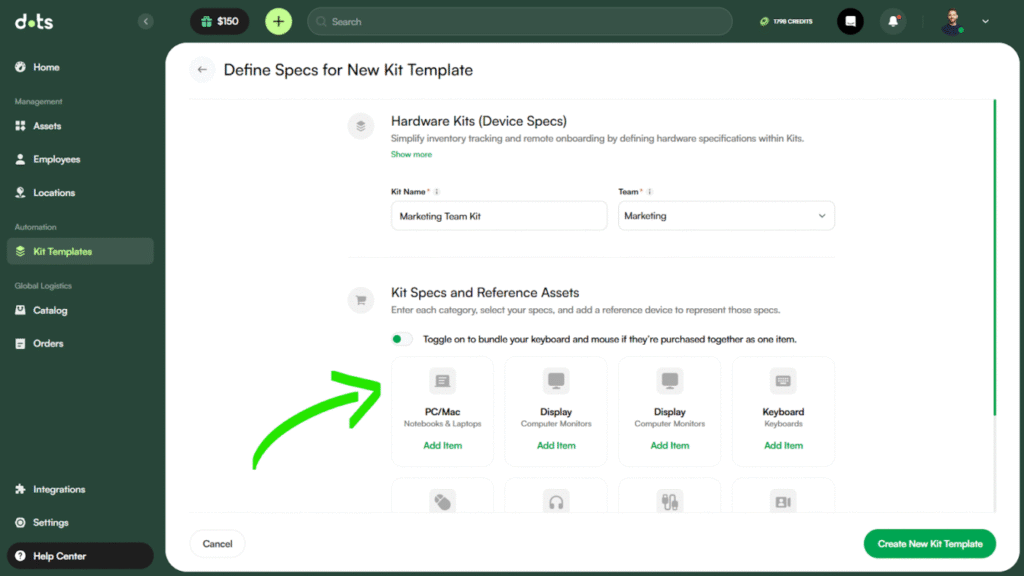
Step 3: Define the Kit Specs
For each item, you’ll define the specs you need.
Important: You are not selecting specific assets here. You are defining the required specs. These specs determine which assets can be included in the kit. This is important for IT asset management and IT procurement automation, as it allows you to be as wide or as narrow as you wish when defining what goes in your Kit.
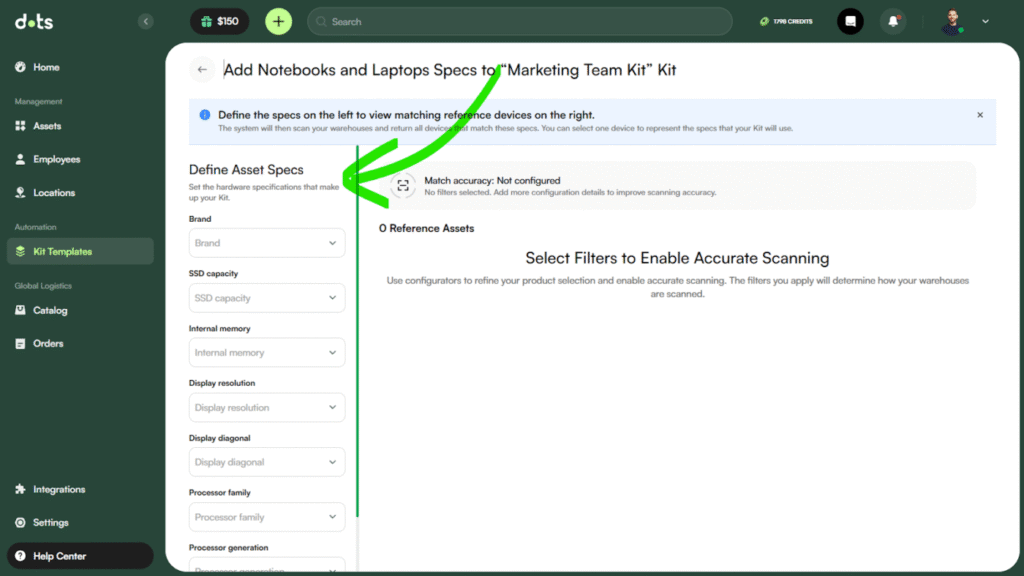
You can add multiple values to each field – so if you don’t mind if it’s a Dell, Lenovo, or HP laptop, add all three in.
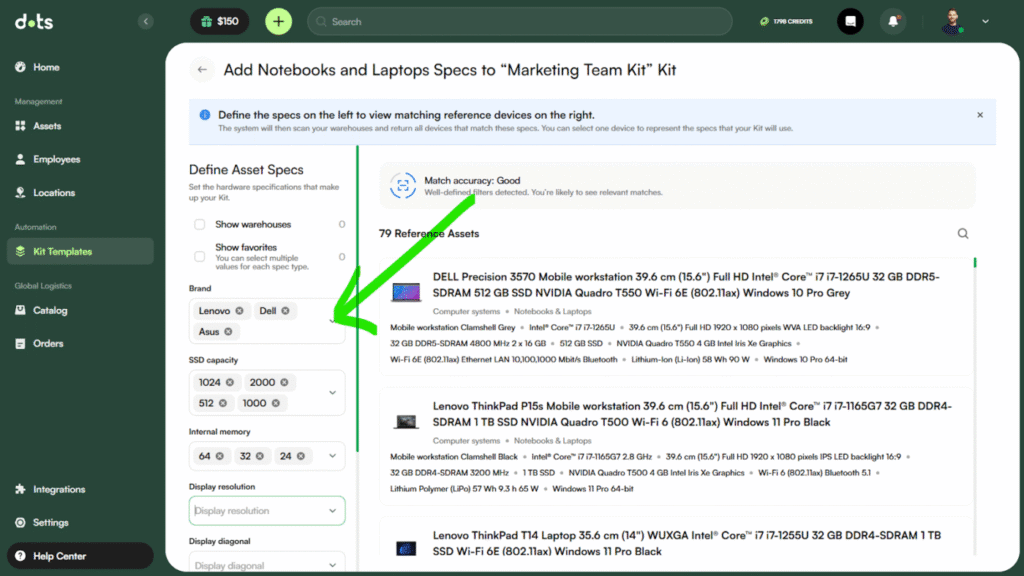
⚠️ Tip: If you define only broad specs like “Brand = Apple” but skip details like model or RAM, Dots will match all Apple devices in stock. Narrow your specs to limit matches or broaden them to increase availability.
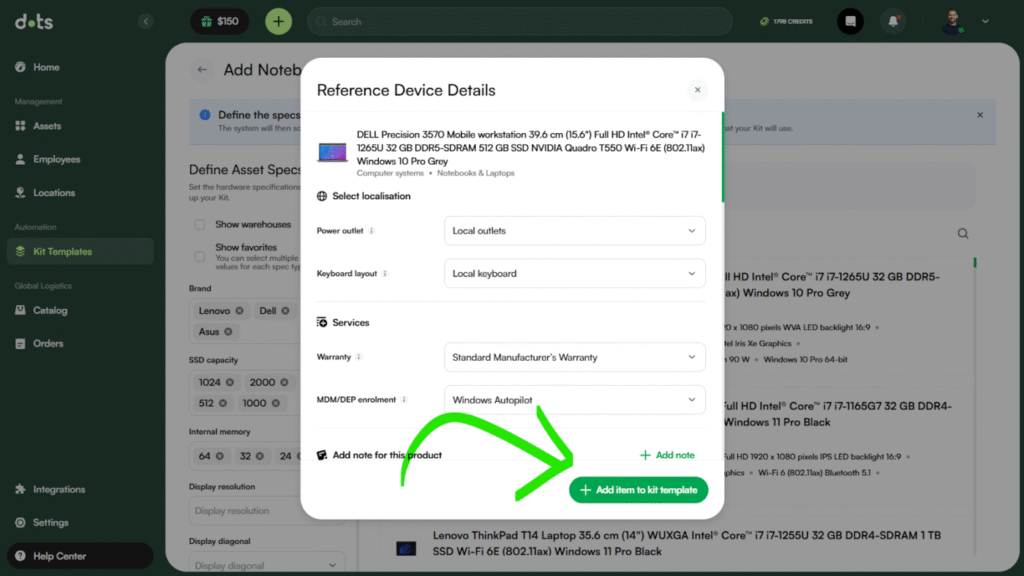
Step 4: Add Reference Assets
Once you’ve defined the specs on the left, Dots will show matching assets on the right.
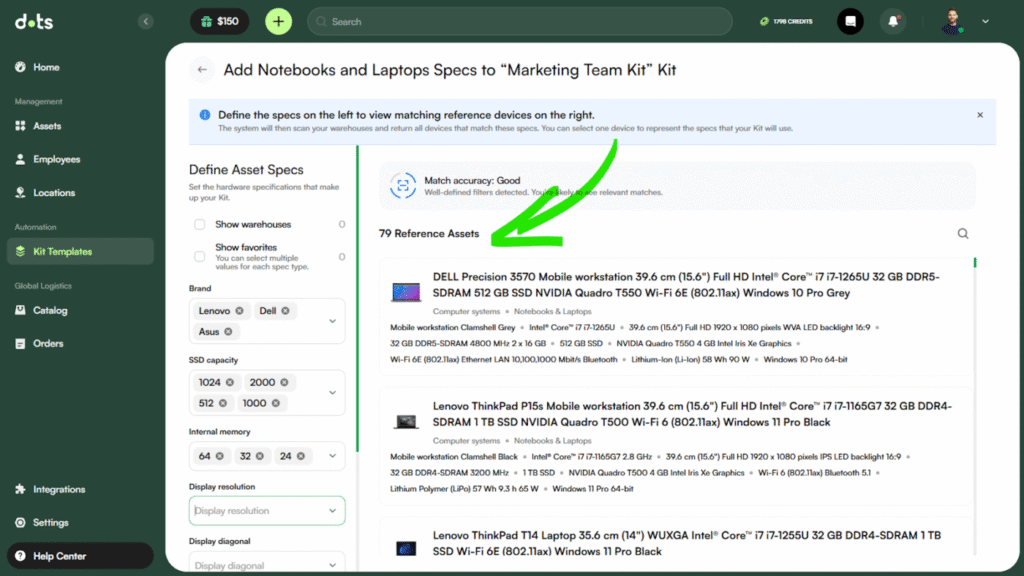
These are reference assets, meaning they match the specs you’ve set. Selecting one simply helps represent the kind of device you’re referring to. It does not lock in that exact item.
Once you select a reference asset, you have the option to define details like:
- Localization (e.g., keyboard language)
- Warranty
- Notes or services to include
However, you don’t have to include them at this stage.
Note: If you later procure these devices, you will be required to fill them in upon making the order.
Returning back to the main screen, you can include up to:
- 1 primary computer (PC, Mac, or notebook)
- 2 displays
- Peripherals like mouse, keyboard, headset
- Extras such as swag or accessories
Repeat this process for each kit item. You don’t have to fill in all the placeholders.
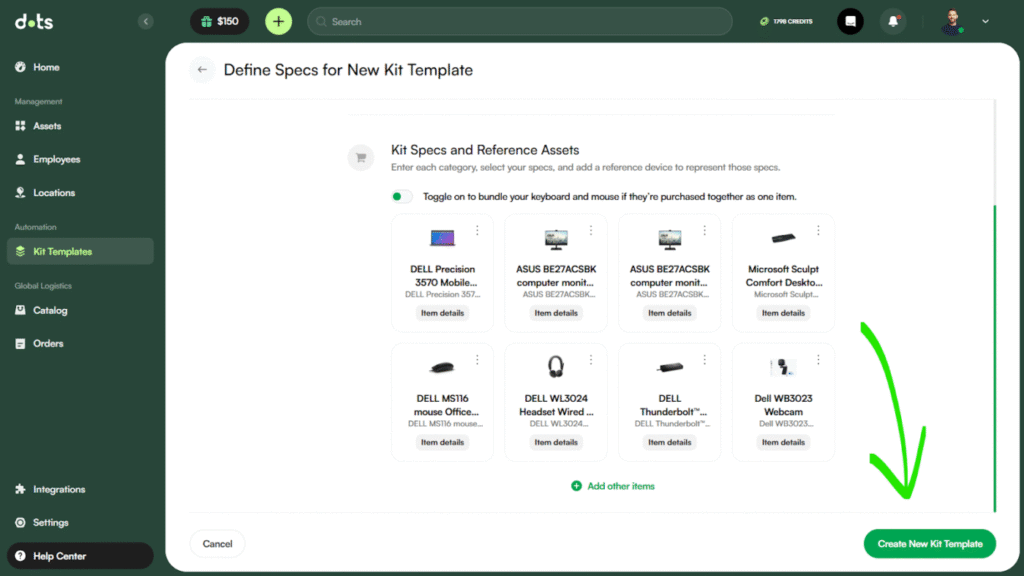
Step 5: Create the Kit Template
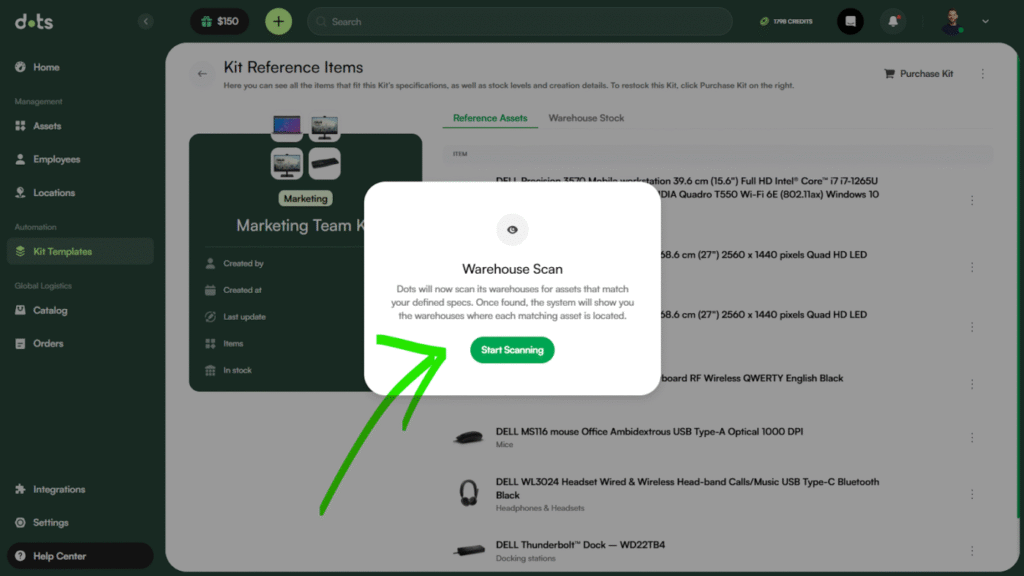
Once all items have been added and reference assets selected, click Create Kit Template in the bottom-right corner.
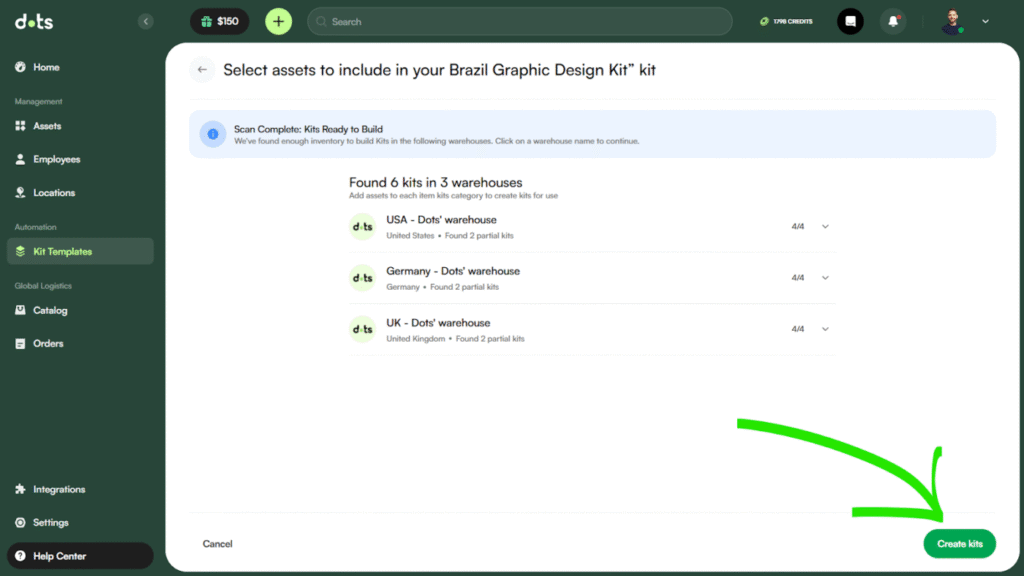
Dots will scan its warehouses (note: Dots won’t scan your offices and locations) and identify where full kits or partial kits matching your specs are currently available.
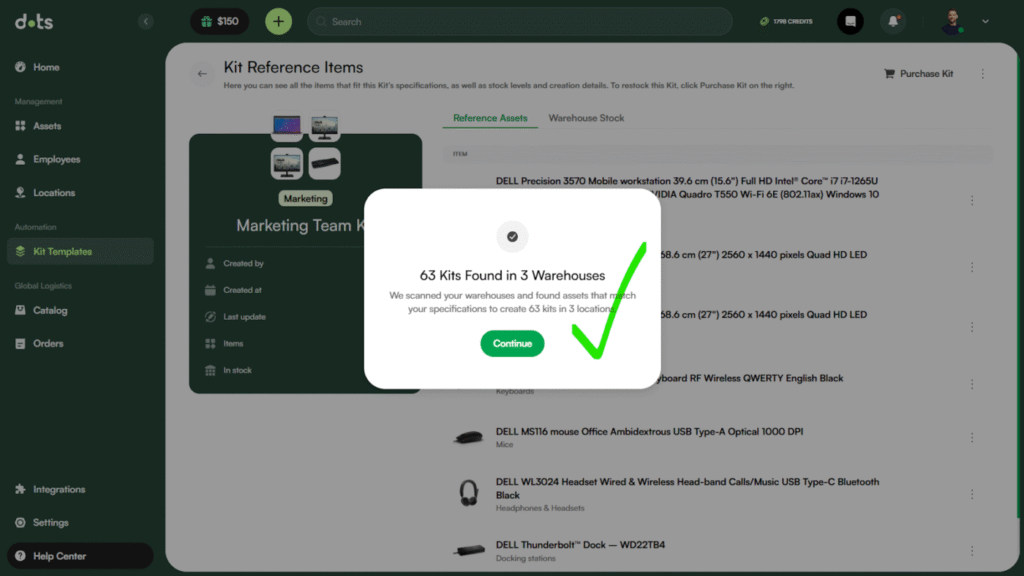
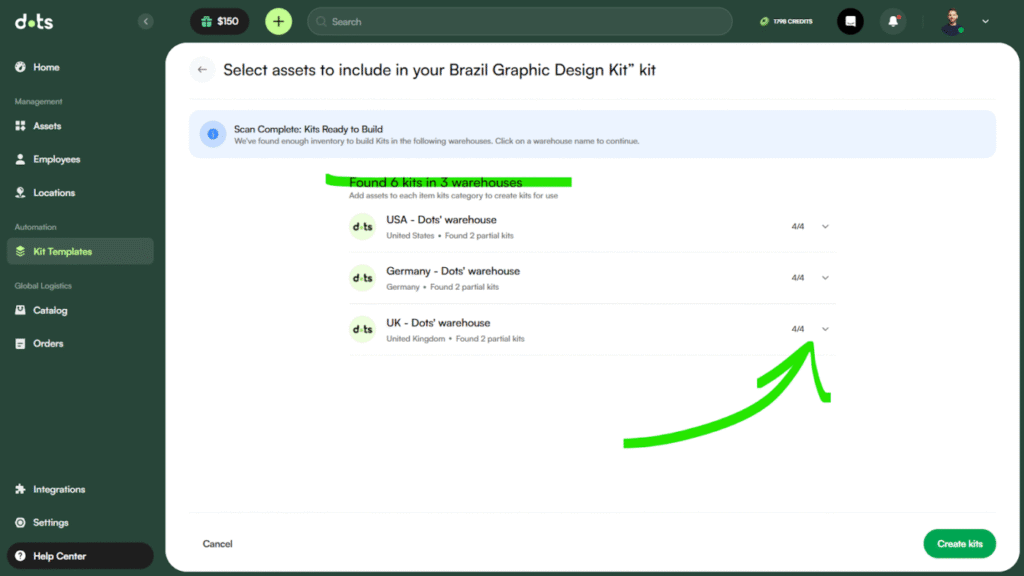
By clicking Continue, you’ll see:
- The number of kits available
- Which warehouses have them
- A match count (e.g., 4 out of 4 means all items in the kit are available)
We’ve now switched to our Brazil Graphic Design Kit to continue this tutorial, where you’ll see we have 6 full kits available in 3 warehouses.
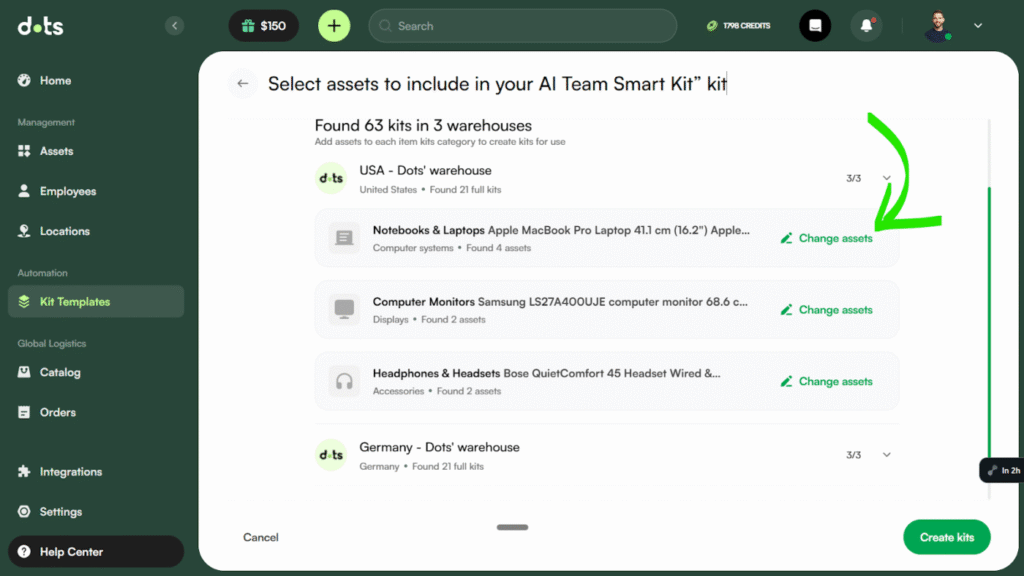
Step 6: Changing Matched Assets (Optional)
If you click on the small arrow beside the matching Kit assets, you can click to manually select which items to include. This lets you choose only the devices your team truly wants, even if other assets you own also match the specs. This is important for IT asset management automation, as you can specifically exclude assets that are not relevant for your Kit.
You can deselect assets as by unchecking the boxes beside each asset:
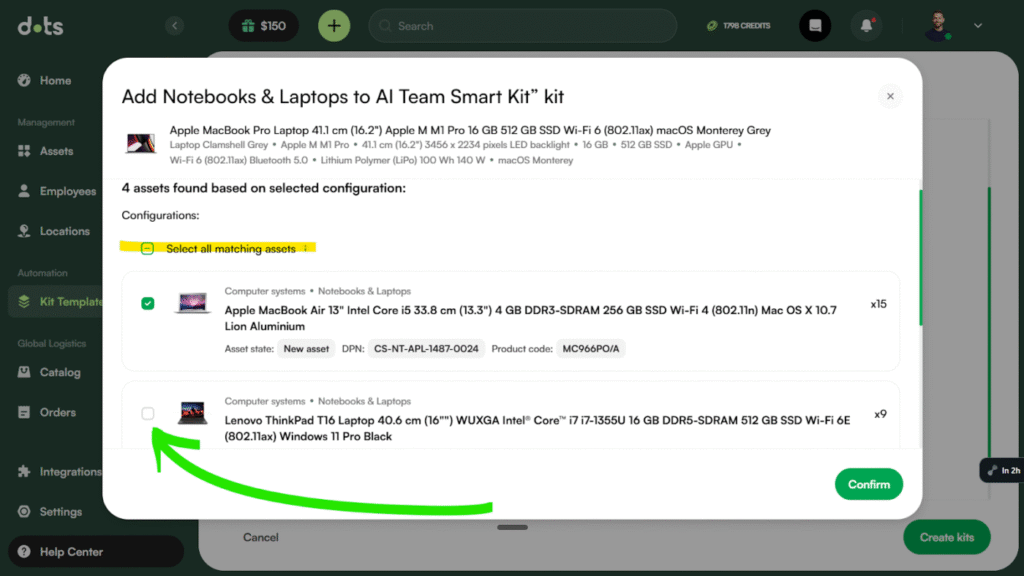
Keep in mind: If you exclude certain models (e.g. older MacBooks), the number of complete kits found may be lower. Choosing more flexible or inclusive specs can increase your available kits.
Step 7: Create Kits
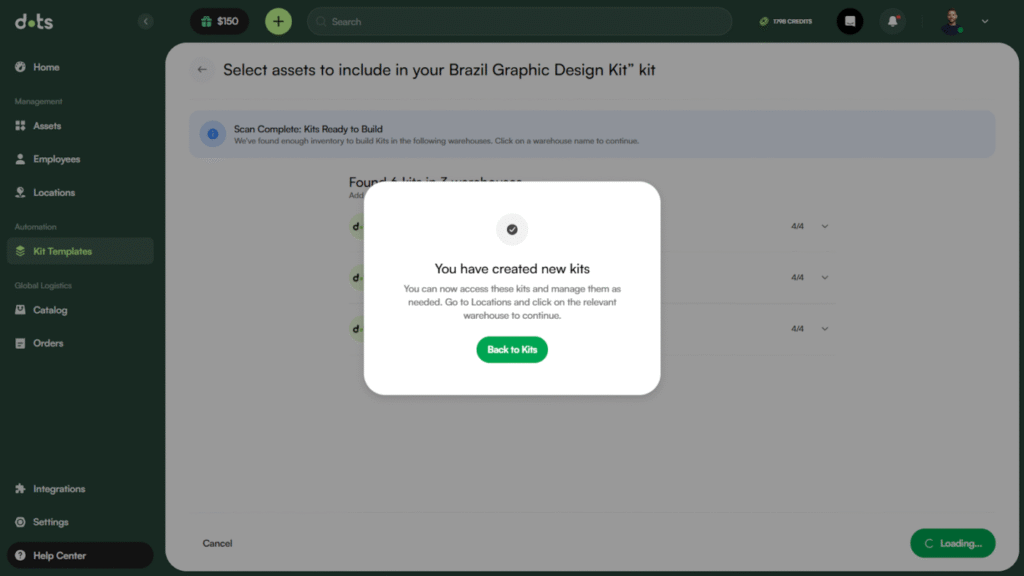
Click Continue, and then select Create Kits. This action bundles those assets into a recognized kit within the system.
From this point on, Dots will treat them as deployable kits for tracking your stock in Dots warehouses or you will be able to use it for restocking and general procurement.
Step 8: Procure Kits
To restock or order new kits, go back to the kit template. Click Purchase Kits in the top-right corner.

You’ll be guided through the usual procurement flow where you can choose:
- A delivery location
- A specific employee
- Or to stock the kits in one of Dots’ warehouses
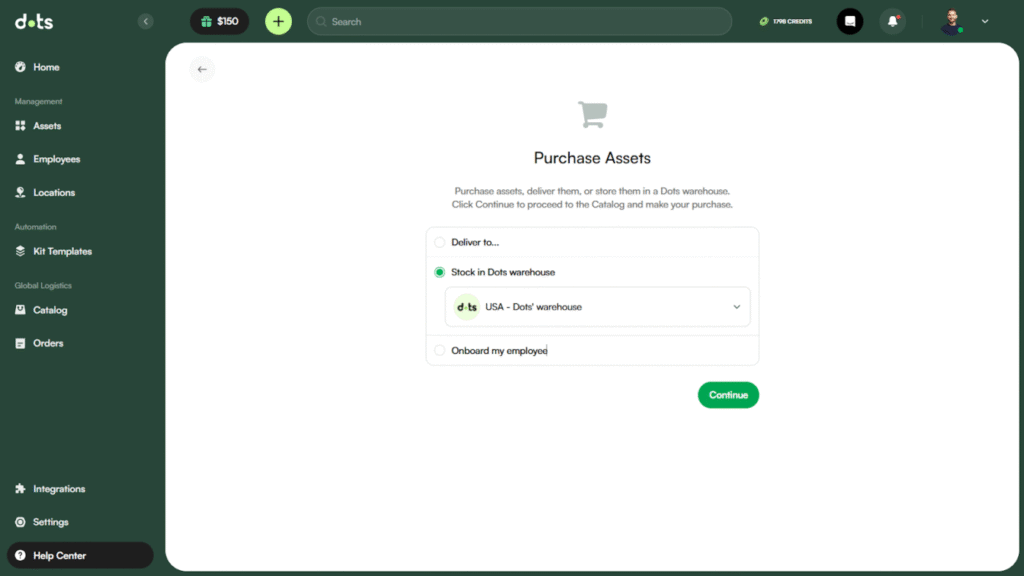
You can then specify the number of kits to add to your cart, and click Continue.
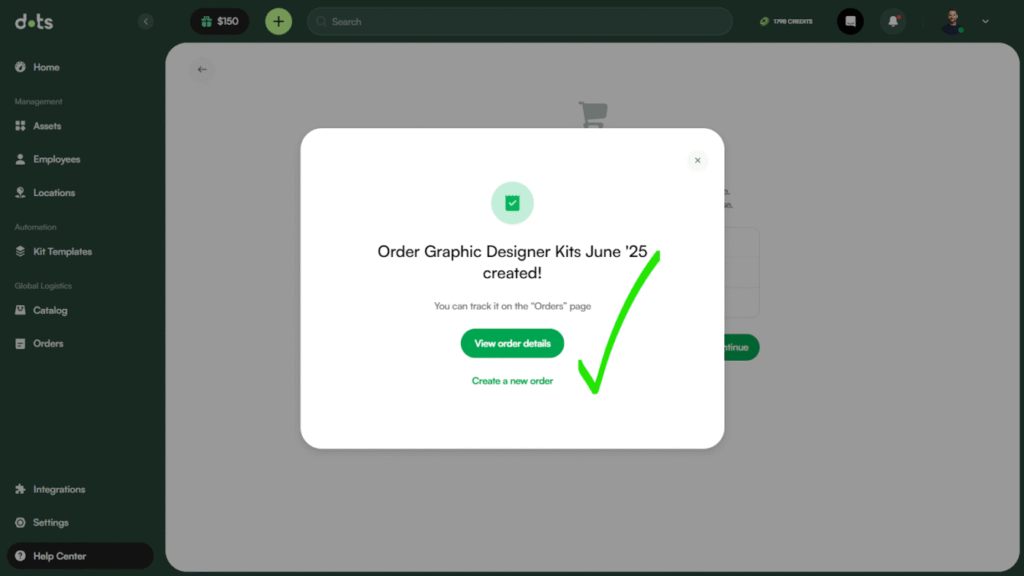
Then, follow the usual flow to:
- Request a quote
- Add expected delivery details
- Complete the order
Dots’ procurement team will handle the rest and get back to you with a quote and estimated arrival date. By scanning your warehouses for your available kits and ordering in just a few clicks, you can restock warehouses and you are one step closer to complete IT procurement automation.
Returning to Kits: Rescan Your Kits
At any stage after creating your Kit template, you can re-scan Dots warehouses to check the latest availability. Click Start Scan to trigger a fresh search. This ensures you’re seeing up-to-date data, especially if assets have changed recently.
Final Notes
- Remember, you’re defining specs, not locking in specific devices
- Multiple options can be added per spec field (e.g., several brands or memory configs)
- If you skip localization or services, you’ll be prompted to add them at the procurement stage
- Kits are only matched to Dots warehouses, not internal office stock.
The Kits workflow makes it faster to set up and procure hardware for specific teams. You can create tailored kits, check warehouse availability and stock levels in seconds, and restock in just a few clicks.
If you need help at any point, contact our support team ([email protected]) or visit the Help Center.