How to integrate OneLogin SSO with DOTS
This guide explains how to configure a custom SAML application in OneLogin and connect it to the Dots platform.
Following completion of this manual you will be able to log in securely to Dots via your dedicated Dots App via the OneLogin app portal.
Before you begin, make sure you have:
- Admin access to your OneLogin account
- Access to Settings in the Dots platform
- Permission to assign applications to users in OneLogin
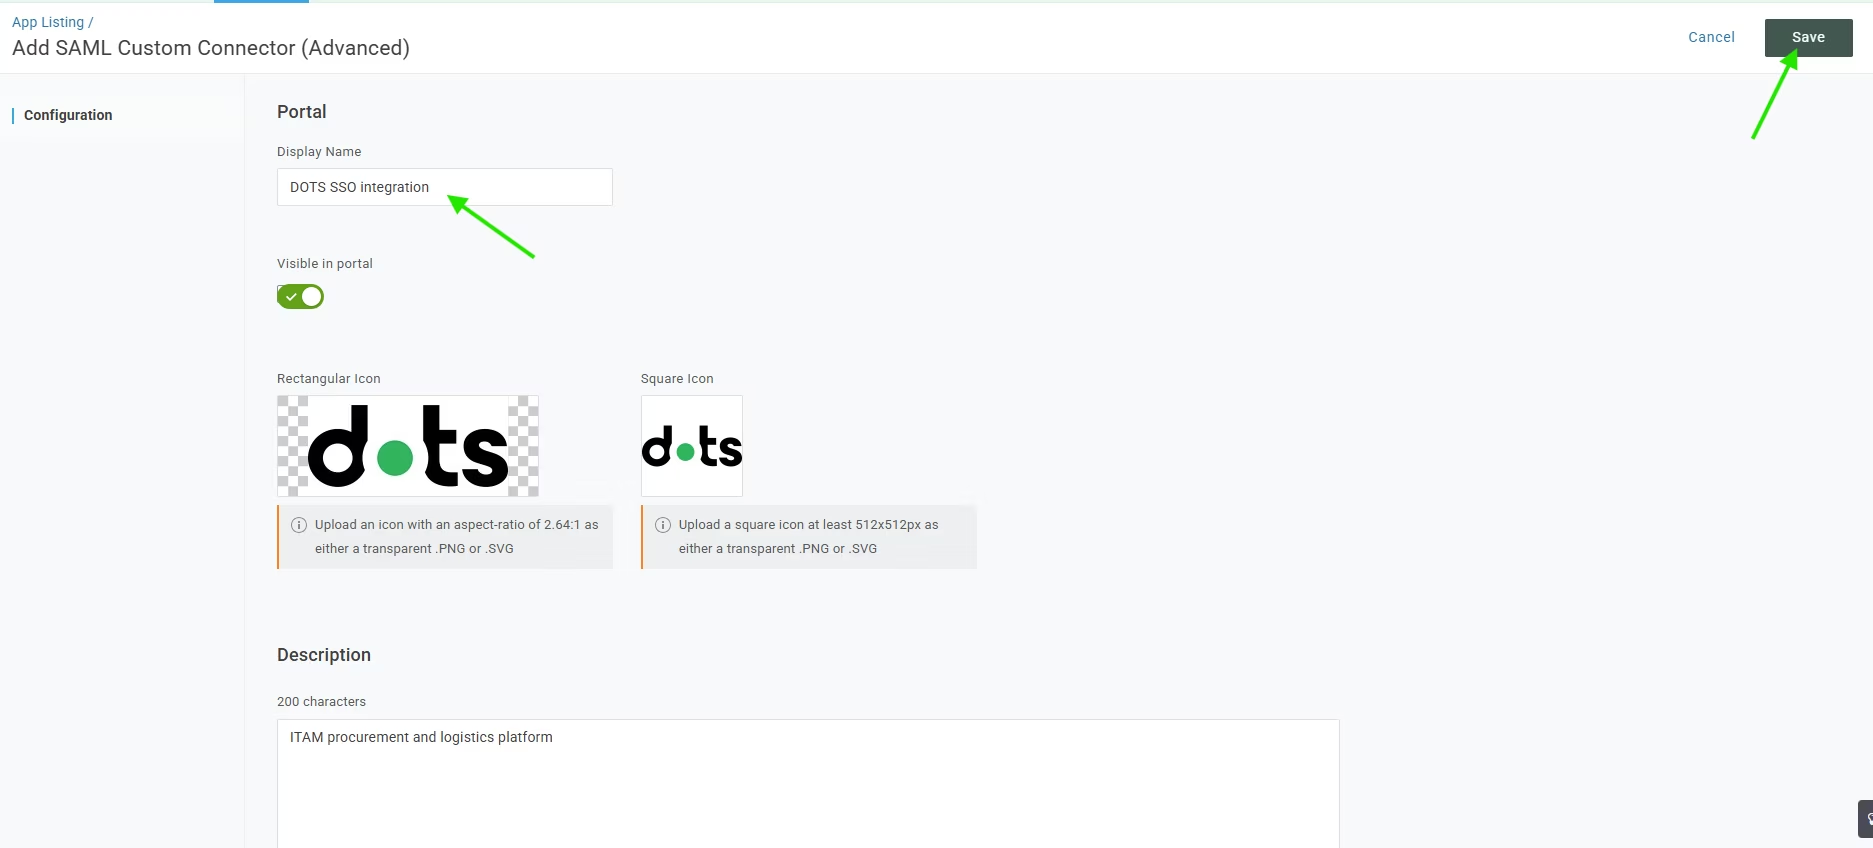
Step 1: Create a new application in OneLogin
1. Log in to your OneLogin admin dashboard and open the Applications section. Click Add App.
2. In the search field, enter SAML Custom Connector (Advanced) and select it from the list.

3. In the Display Name field, enter a name that clearly identifies the integration. For example: Dots SSO.
4. Save the application.
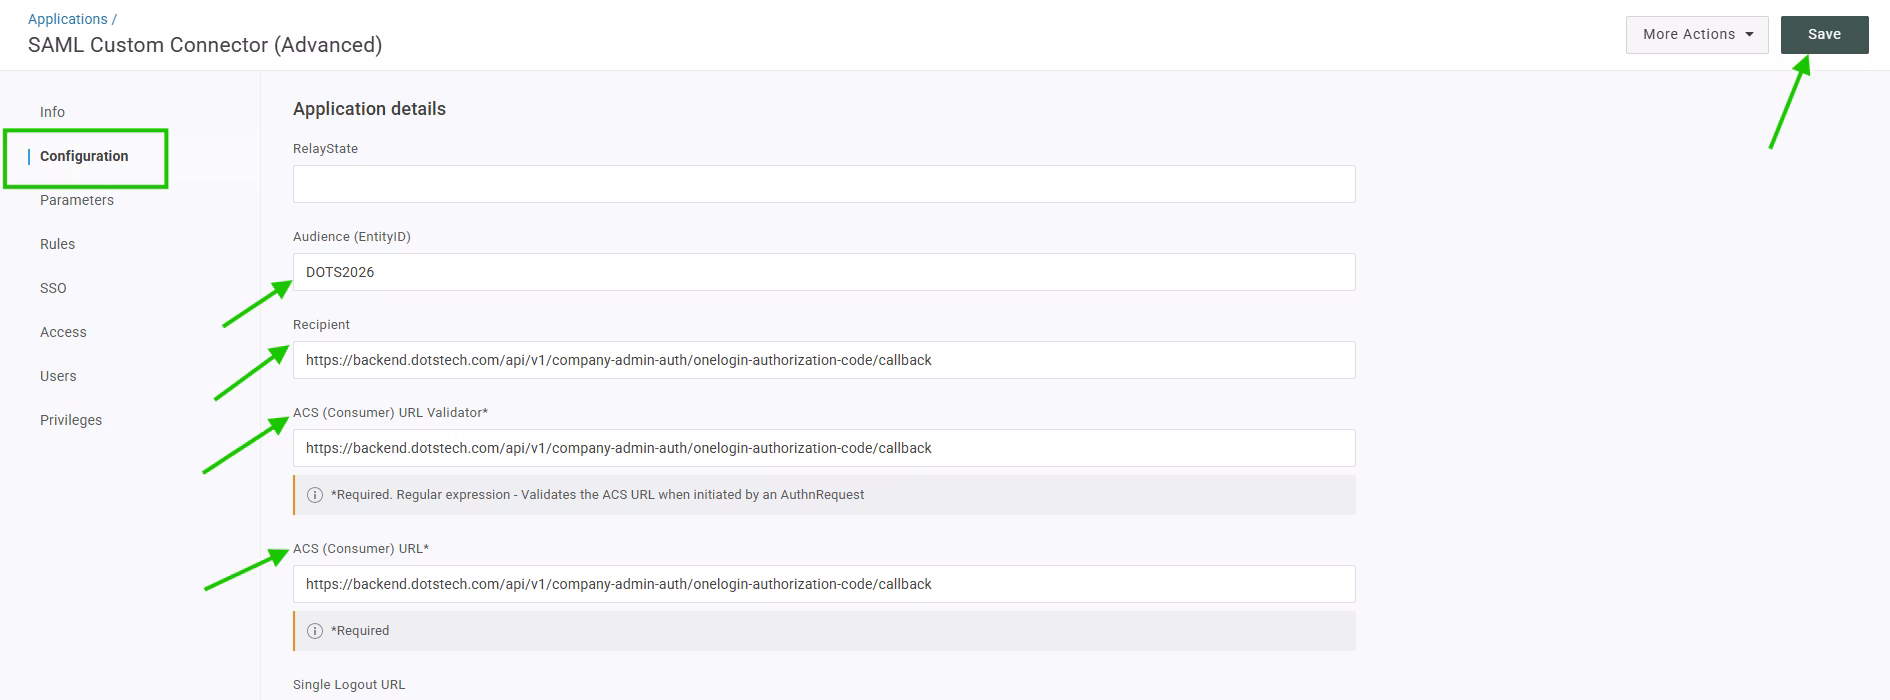
Step 2: Configure the SAML application
Open the application’s Configuration settings and fill in the following fields:
Audience (EntityID): DOTS2026
Recipient:
https://backend.dotstech.com/api/v1/company-admin-auth/onelogin-authorization-code/callbackACS (Consumer) URL Validator:
https://backend.dotstech.com/api/v1/company-admin-auth/onelogin-authorization-code/callbackACS (Consumer) URL:
https://backend.dotstech.com/api/v1/company-admin-auth/onelogin-authorization-code/callbackSave the changes.
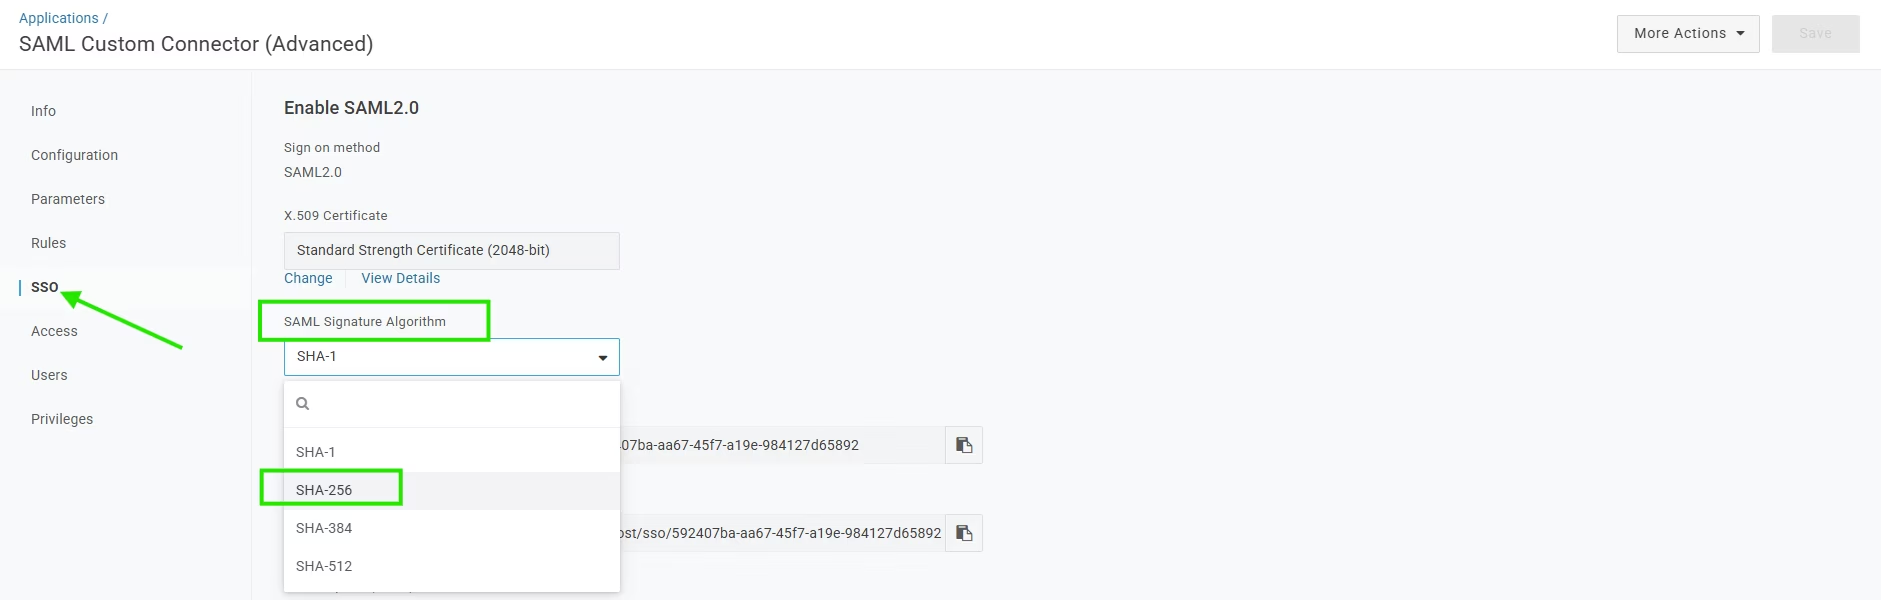
Step 3: Update the signing algorithm
1. Open the application’s SSO settings.
2. Set the SAML Signature Algorithm to SHA-256.
3. Save the changes.
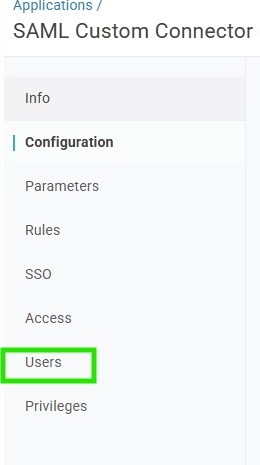
Step 4: Assign the application to users
In OneLogin, go to the Users section and assign the new application to the users who should be able to sign in to Dots through SSO.
Note: For the login to be successful, any user assigned in OneLogin must also have a user account in Dots.
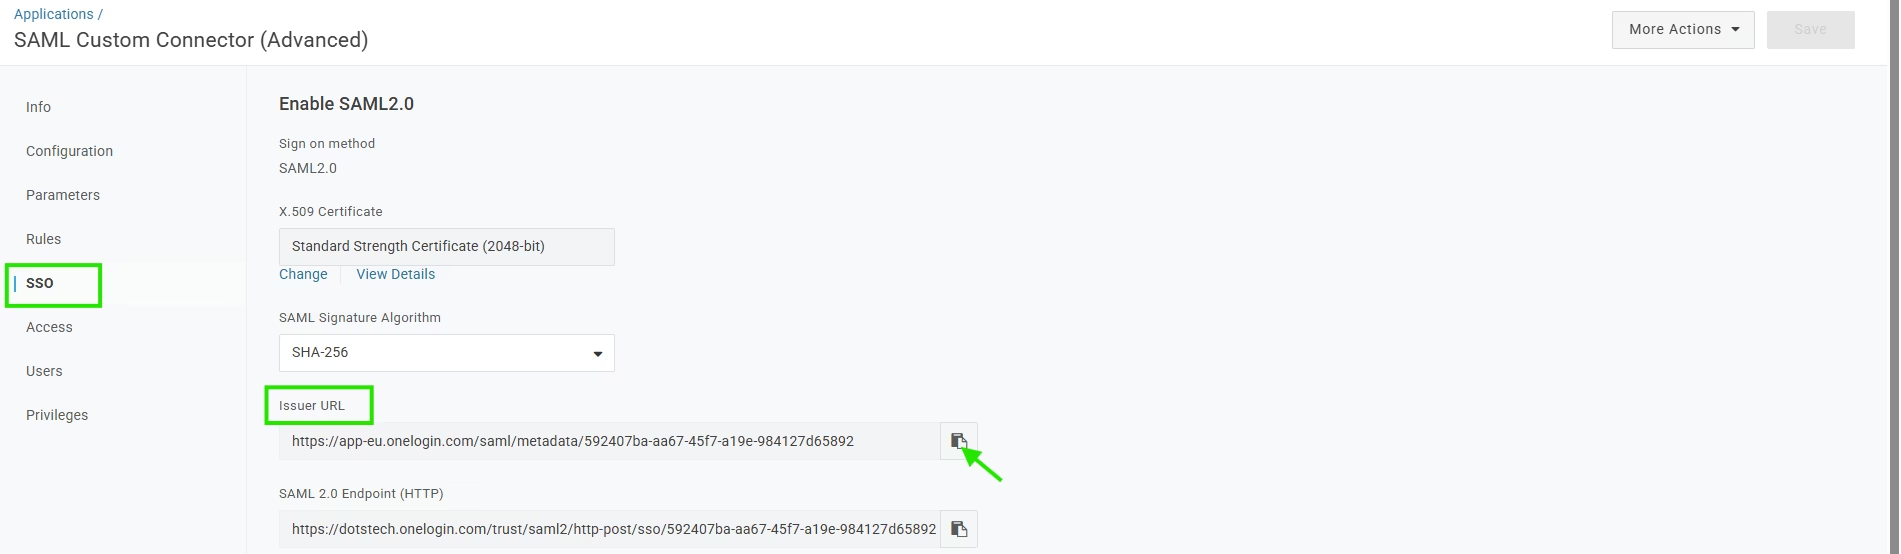
Step 5: Copy the Issuer URL from OneLogin
After the application is configured, go back to the SSO tab and copy the Issuer URL. You will need this value to complete the setup in Dots.
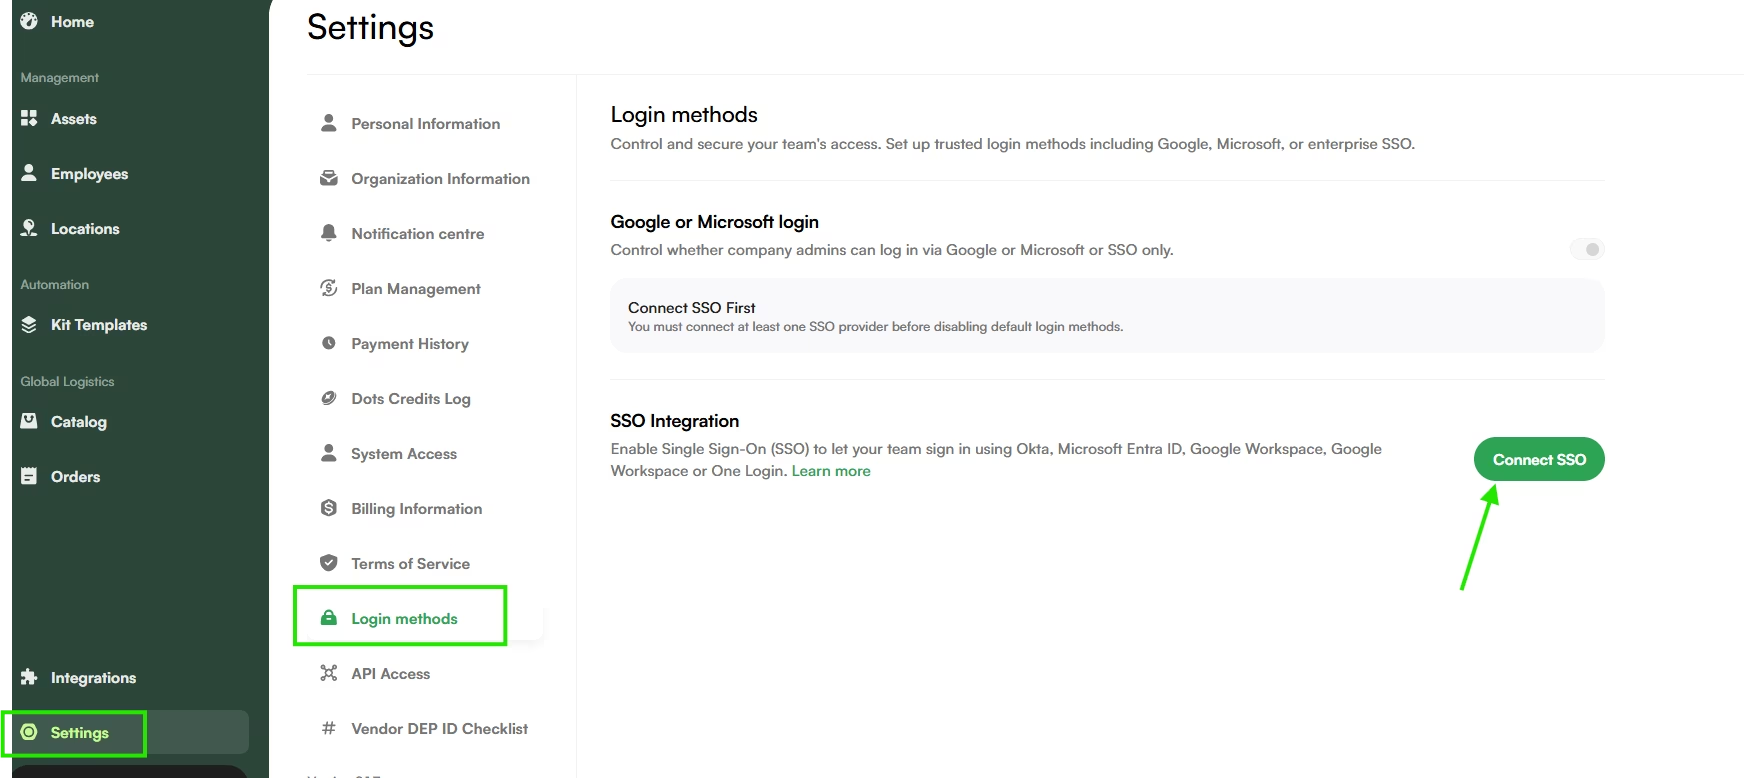
Step 6: Connect OneLogin SSO in Dots
1. Log in to the Dots platform.
2. Go to Settings and open Login Methods.
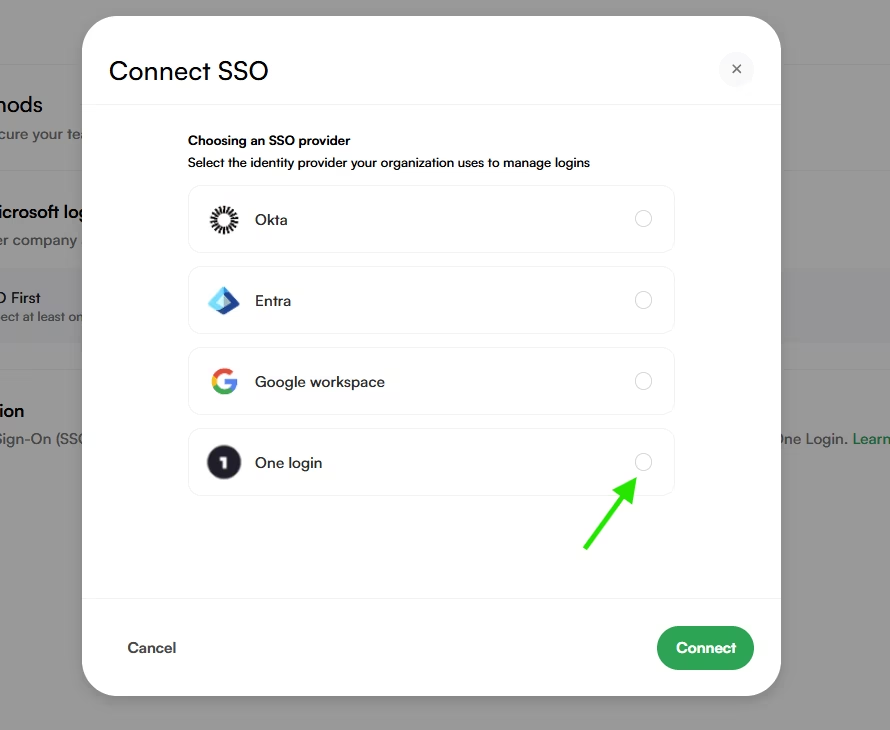
3. Choose OneLogin SSO and click Connect.
4. Paste the Issuer URL copied from OneLogin into the relevant field.
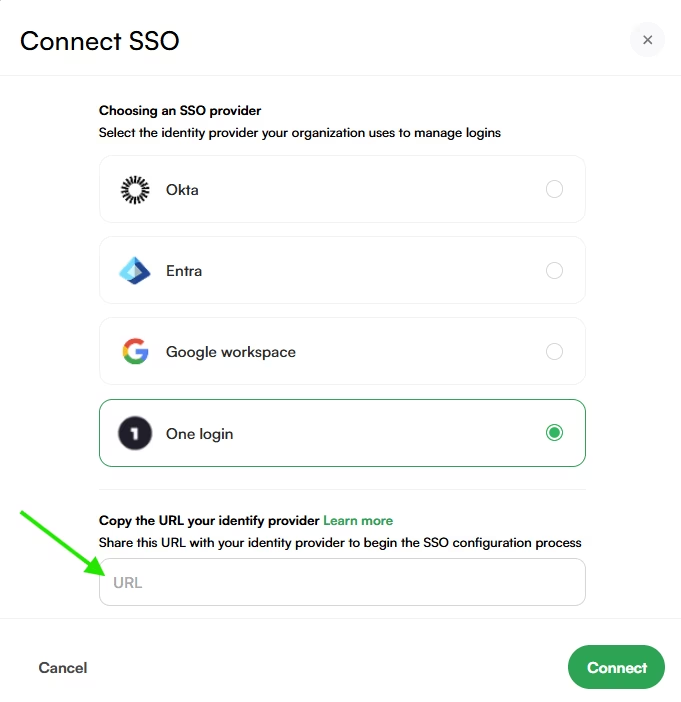
5. Click Connect to complete the setup.
6. Setup complete! Your OneLogin SSO integration is now configured for Dots.
To log in to Dots, open your OneLogin App Portal and click on the Dots app you have created.
Troubleshooting
If the connection does not work as expected, verify that:
- All SAML fields were entered exactly as shown above.
- The Issuer URL was copied correctly.
- The application is assigned to the correct users.
- The signature algorithm is set to SHA-256.
For any additional questions, please open a ticket via the Dots UI or write to [email protected].