Entra SSO (Azure ID) login setup with DOTS
DOTS users have the ability to configure Entra as their default Identity Provider to power Single Sign On (SSO).
This manual provides detailed instructions for Dots clients on configuring Entra Single Sign-On (SSO) as their primary Identity Provider. As part of the setup, you will create a Dots Enterprise application, which will allow you to access Dots through your Entra App portal.
Identity provider-initiated flow: This authentication flow occurs when the user initiates a login to Dots from the Entra portal.
In order to proceed with configuring login with SSO through Entra, you must:
- Be an Entra Administrator.
- Have access to an Microsoft Entra Admin Center.
- Be an existing Dots enterprise plan client.
Configuration Steps:
- Login to Microsoft Entra admin center.
- Click on the Applications tab on the left side index and choose Enterprise applications.
- Click on the New application button, in the top index bar.

4. The Microsoft Entra Gallery page will open. Click on Create your own application, and a side page will open on the right side of the screen.

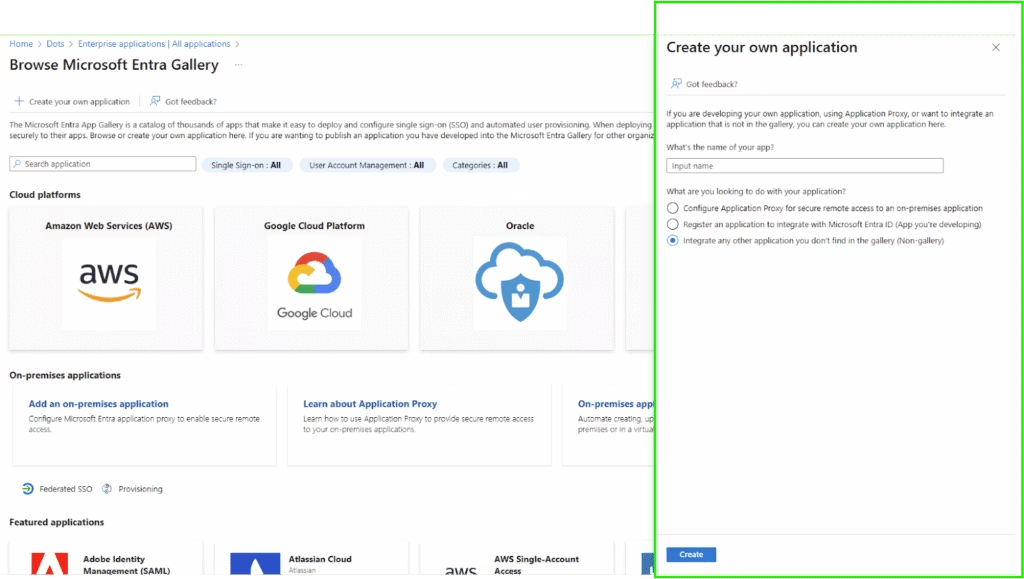
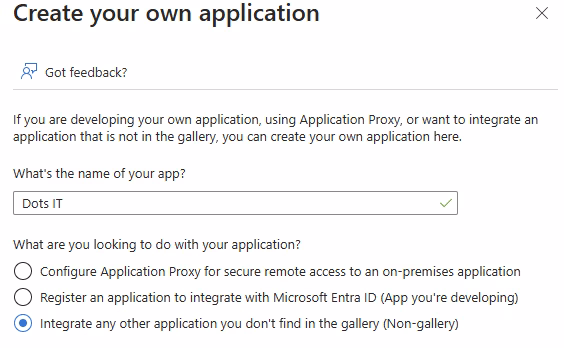
5. Give your app a name, we advise to call the app “Dots”, and mark the option:
“Integrate any other application you don’t find in the gallery (Non-gallery)”.
Click on Create, in the down right side of the screen.
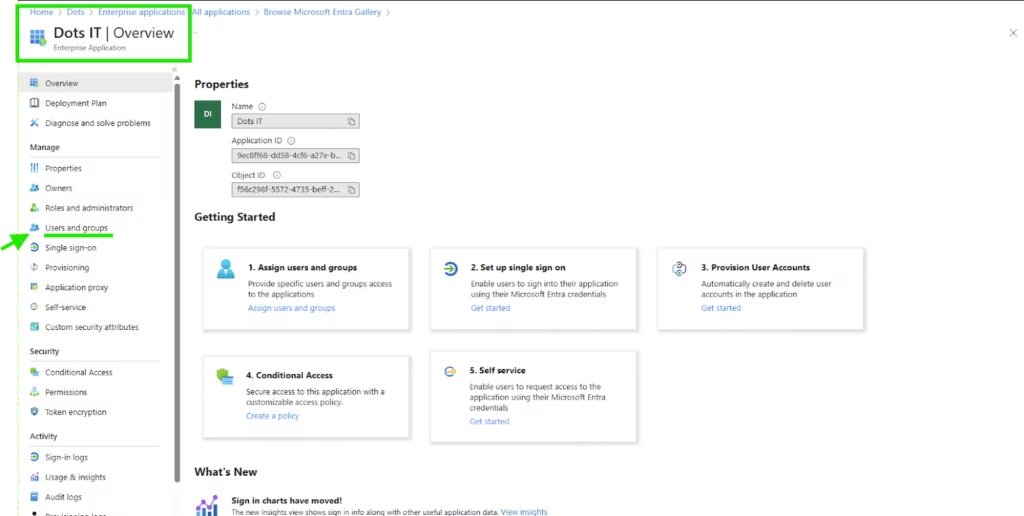
6. Your app page will open, please click on the Users and Groups tab.
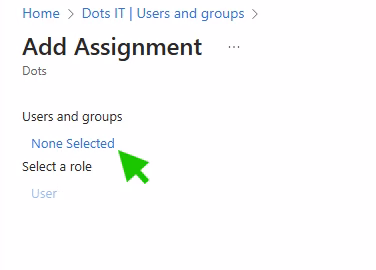
7. Press Add user/group button, and an “Add Assignment” page will open.
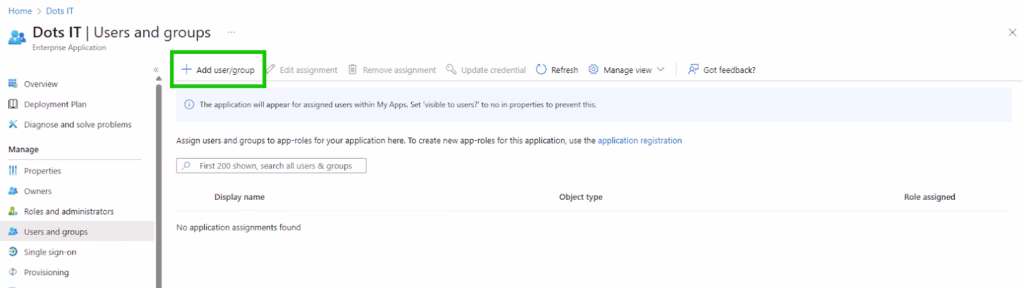
8. Click on None Selected.
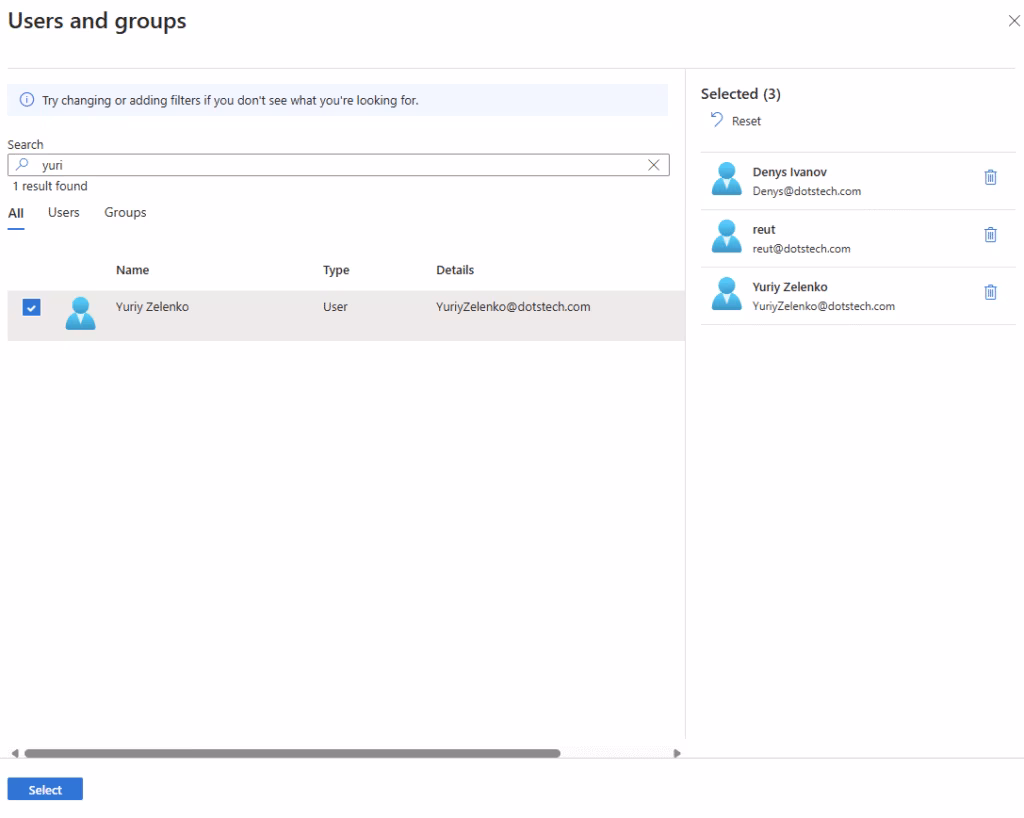
A User and Groups slide page will appear, choose users which you would like the Dots app to be available for, when you finish, press the Select button.
Note: the users selected should have a dots user set with the same email address as set in Entra.
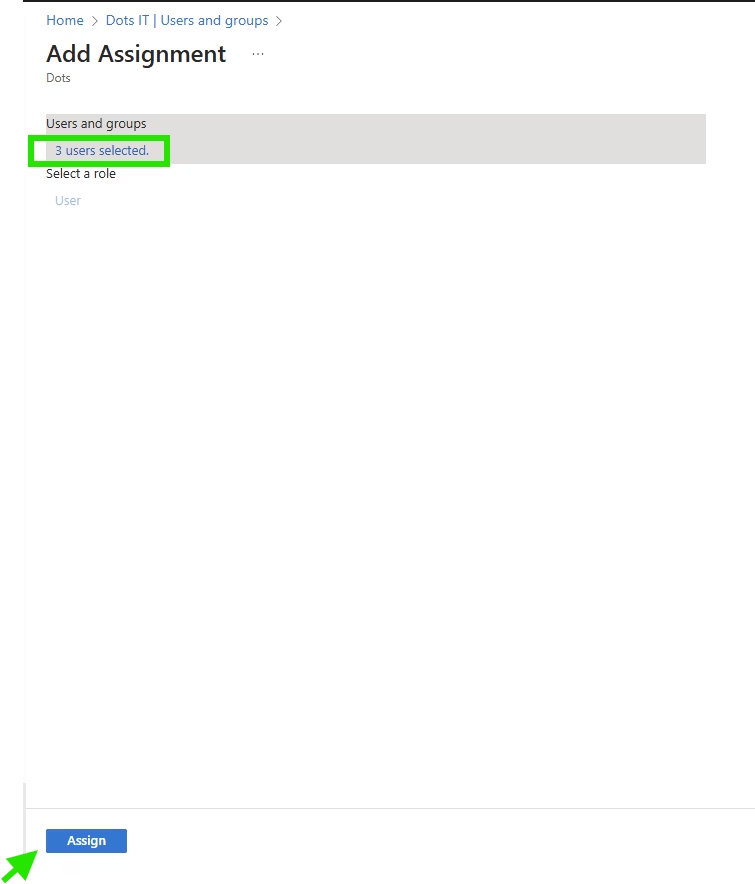
9. Make sure you added all the relevant users which you would like to have access to Dots and press Assign.
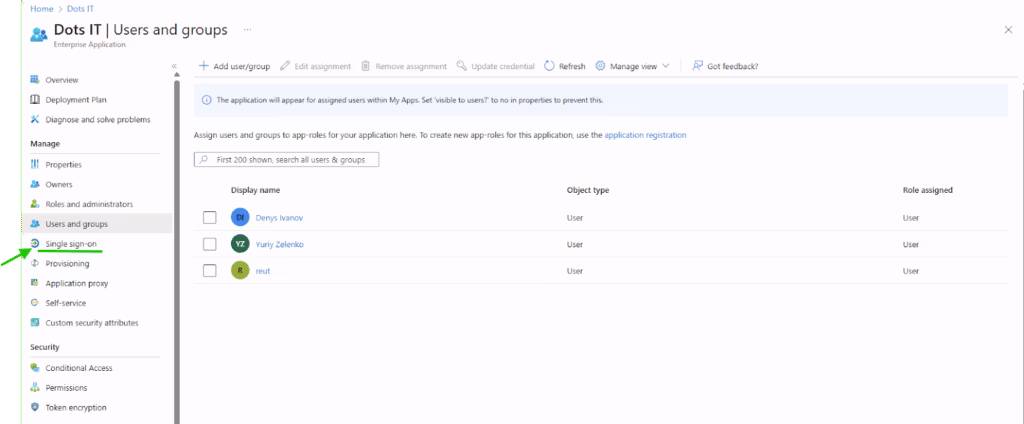
10. You are back on the application page under Users and Groups and you can see all the users you have assigned. Click Single sign-on tab, from the application sidebar index.
11. A new page will appear, please choose the SAML option.

12. A new page will open, please click on Edit under the Basic SAML Configuration.

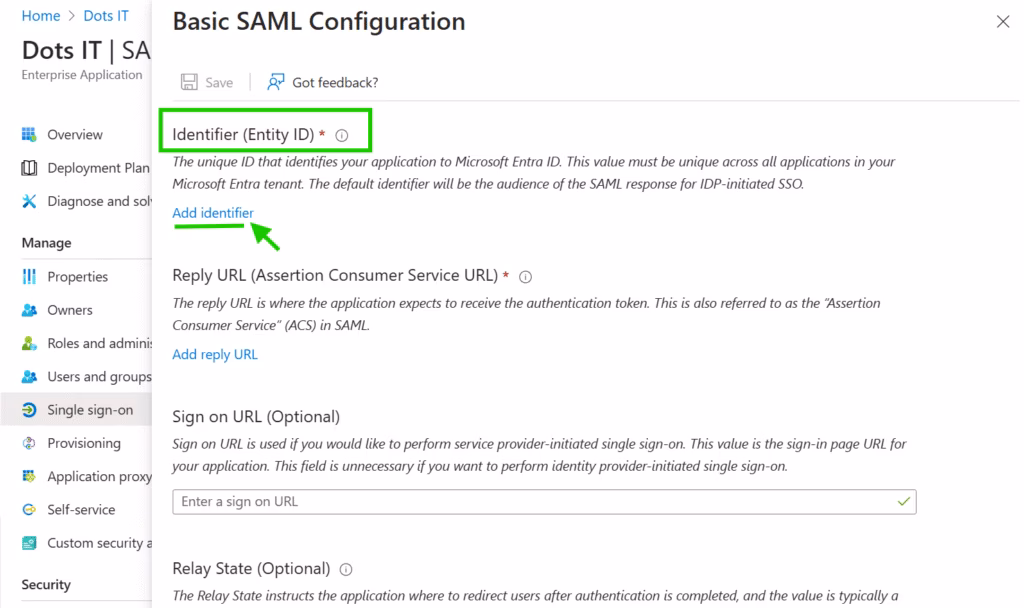
13. A slide page will appear, click Add identifier under the Identifier (Entity ID) option.
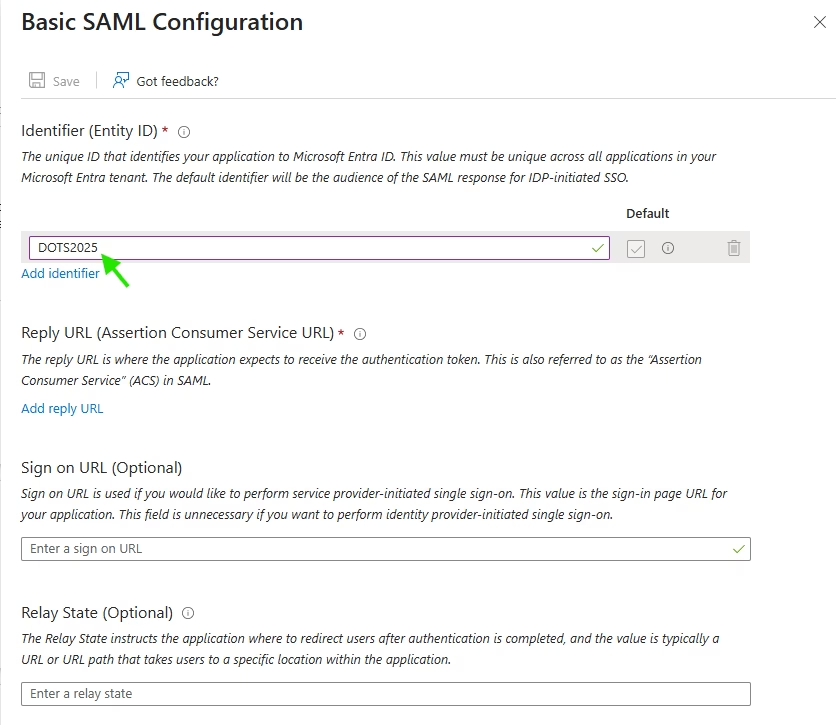
14. Enter “DOTS2025” in the empty field;
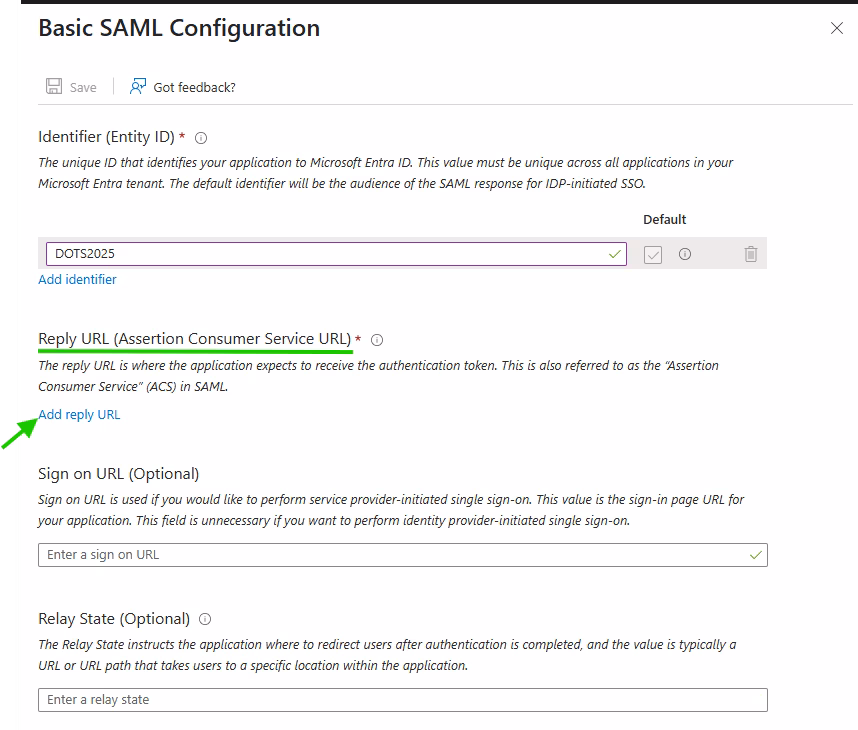
15. Under Reply URL (Assertion Consumer Service URL) Click on ‘Add reply URL’.
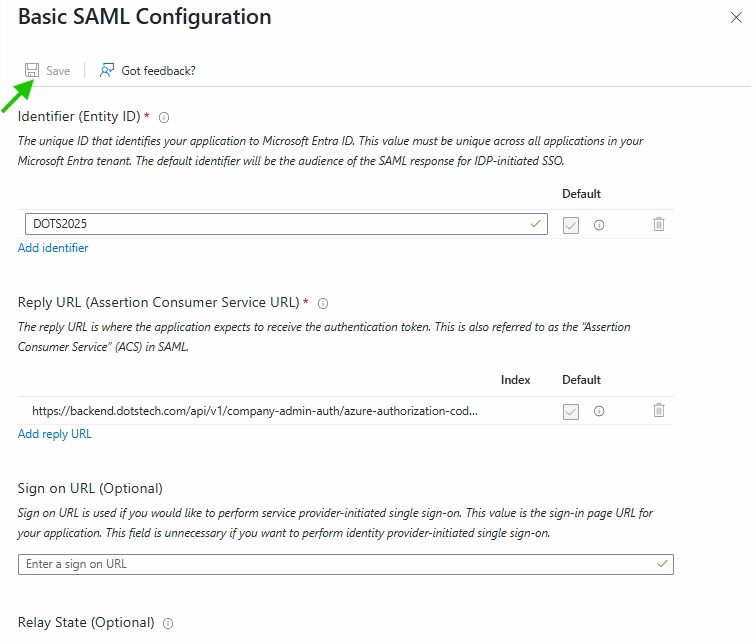
16. Place the following URL in the empty filed: “https://backend.dotstech.com/api/v1/company-admin-auth/azure-authorization-code/callback”.
17. Press the Save button and close the Basic SAML Configuration panel;
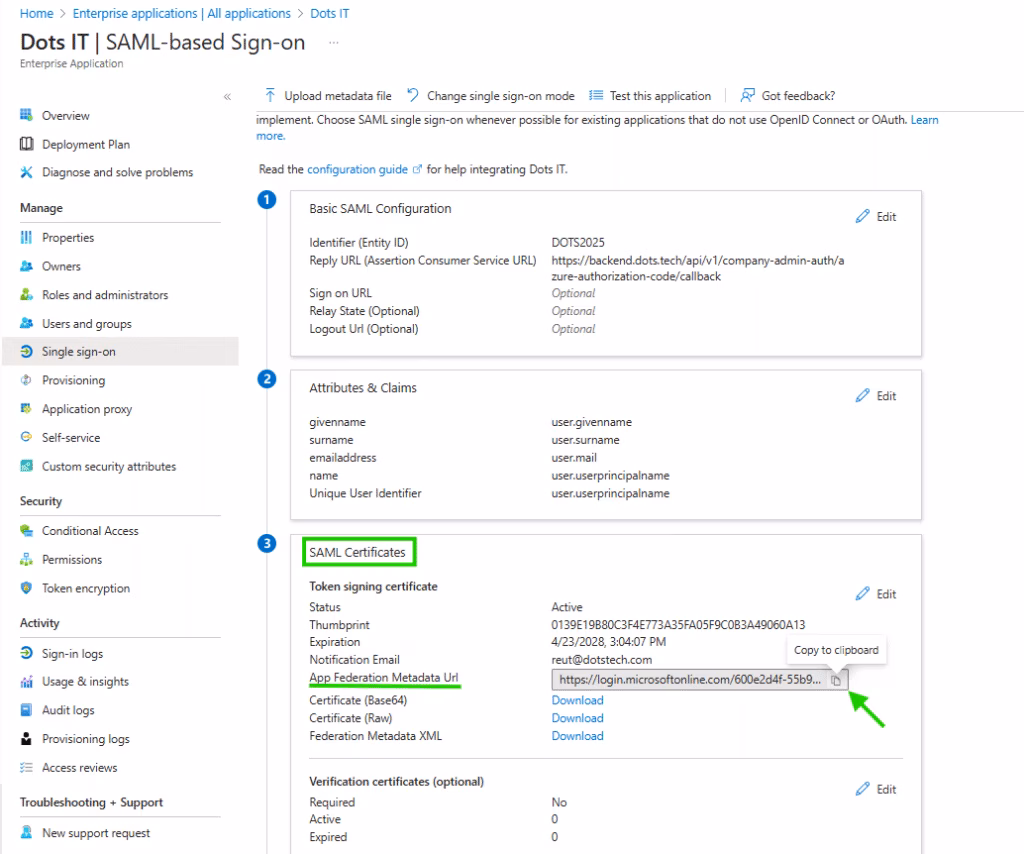
18. In the SAML Certificates section (section number 3) , copy App Federation Metadata URL.
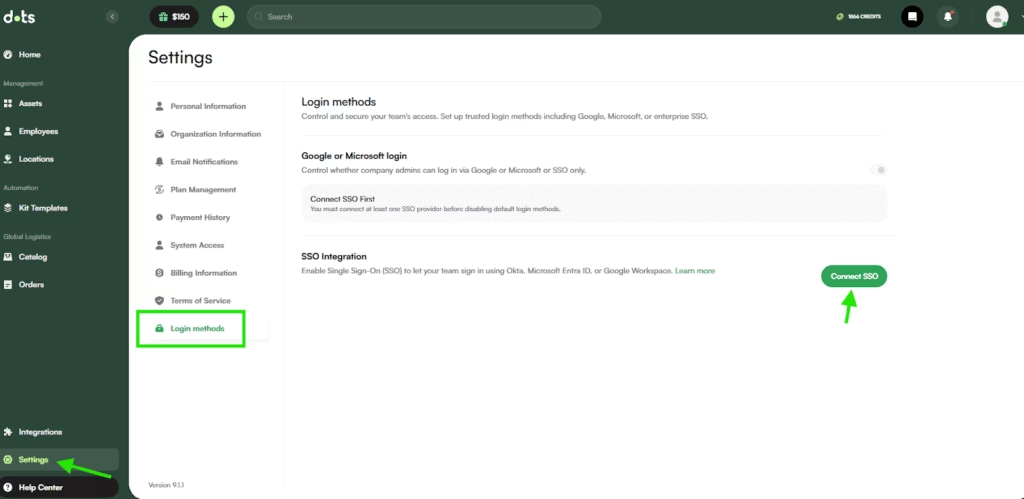
20. Go to your Dots dashboard Settings TAB and choose Login Methods from the index. Click on Connect SSO.
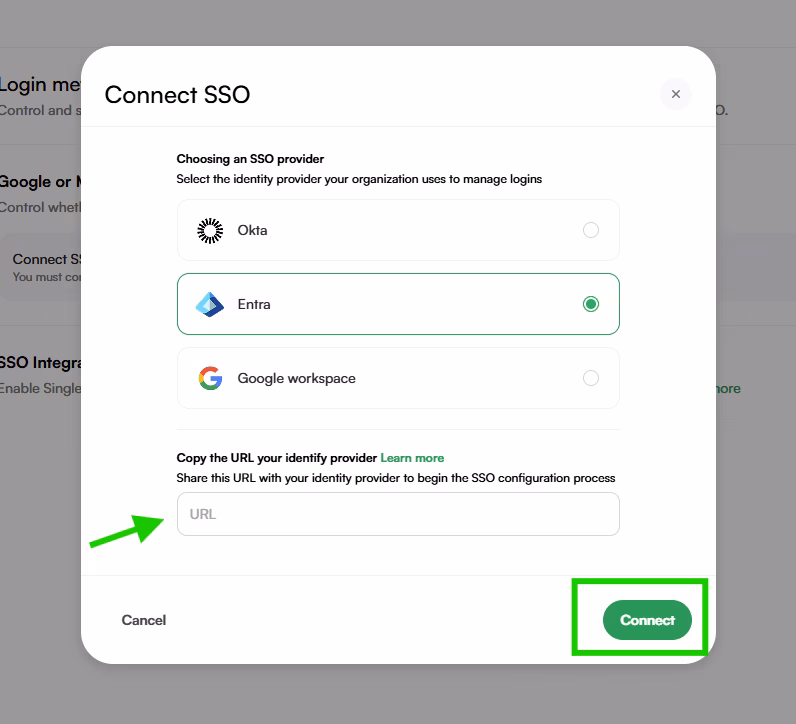
21. Choose Entra and past your App Federation Metadata URL you have saved previously, and click Connect.
Now you are able to login to Dots from Entra app catalog, by clicking the Dots app you have created.
If you encounter any issues please connect our support at-[email protected].